Snake Pillow | Punch Needle Process

At this point, it’s safe to assume everyone picked up at least one “quarantine hobby” during 2020, right? Could have been baking bread, blowing through an obscene number of books or tv shows, or mastering the art of finishing a bottle of wine in one night (these may or may not have been among the list of things I picked up during COVID-19)… While it felt like being “creative” was a struggle during this time, I did decide to take on one large-scale project to keep my hands and mind busy. Incorporating some of my own design skills with a brand new skill (punch needle), I’m quite pleased with the results and want to share my step-by-step with you!
concept + Design
The “need” for this project started with a purchase—a new bedding set, to be exact. After being cooped up in my home for the first couple months of quarantine, I treated myself to a new bedspread, hoping it would give me a sense of changed scenery and introduce some calming, earthy tones to my home. It’s beautiful and months later, I’m still in love with it. But with the initial purchase, my previous decorative pillows just weren’t working anymore.
So I did what any sane crafter would do…I thought to myself “Why shop around for a new pillow when I could make the perfect pillow for the convenient price of 20 normal pillows?”
I started gathering some visual inspiration—shapes of other pillows I really liked (I was drawn to the long-and-skinny pillows), colors, this adorable snake pillow I couldn’t figure out why I loved, but couldn’t get it out of my mind. In addition to these, I also pulled in some inspiration from some travels. On a recent trip to see family in California, my mom and I visited the Rancho Santa Ana botanic gardens. While wandering through, we made the fun discovery that one of the paths was actually tiled to look like a winding snake. Some of the shapes in my initial sketch pull from the form of that path.

Once I had the form established, I then moved from my iPad—where I had pulled together the above mood board + sketch—to my computer to clean it up. There were a couple of iterations, trying to navigate how I wanted the shapes to interact with the overall form of the snake. Once I had settled on my final design, with a pleasant mixture of diamonds and “dots” for some texture play, I then created an outlined version that could be transitioned on to my material as a guide.


Setting up the project
I have to preface this with I probably bit off more than I could chew for my very first self-designed punch needle project. Most projects using punch needle are done on a scale that is accommodated by an embroidery hoop. But I said NOPE, and moved forward with something almost a yard long that would require a custom-built frame to stretch my fabric on. All this to say, this is how I made it work, but I’m still learning, and this may not be the right way.
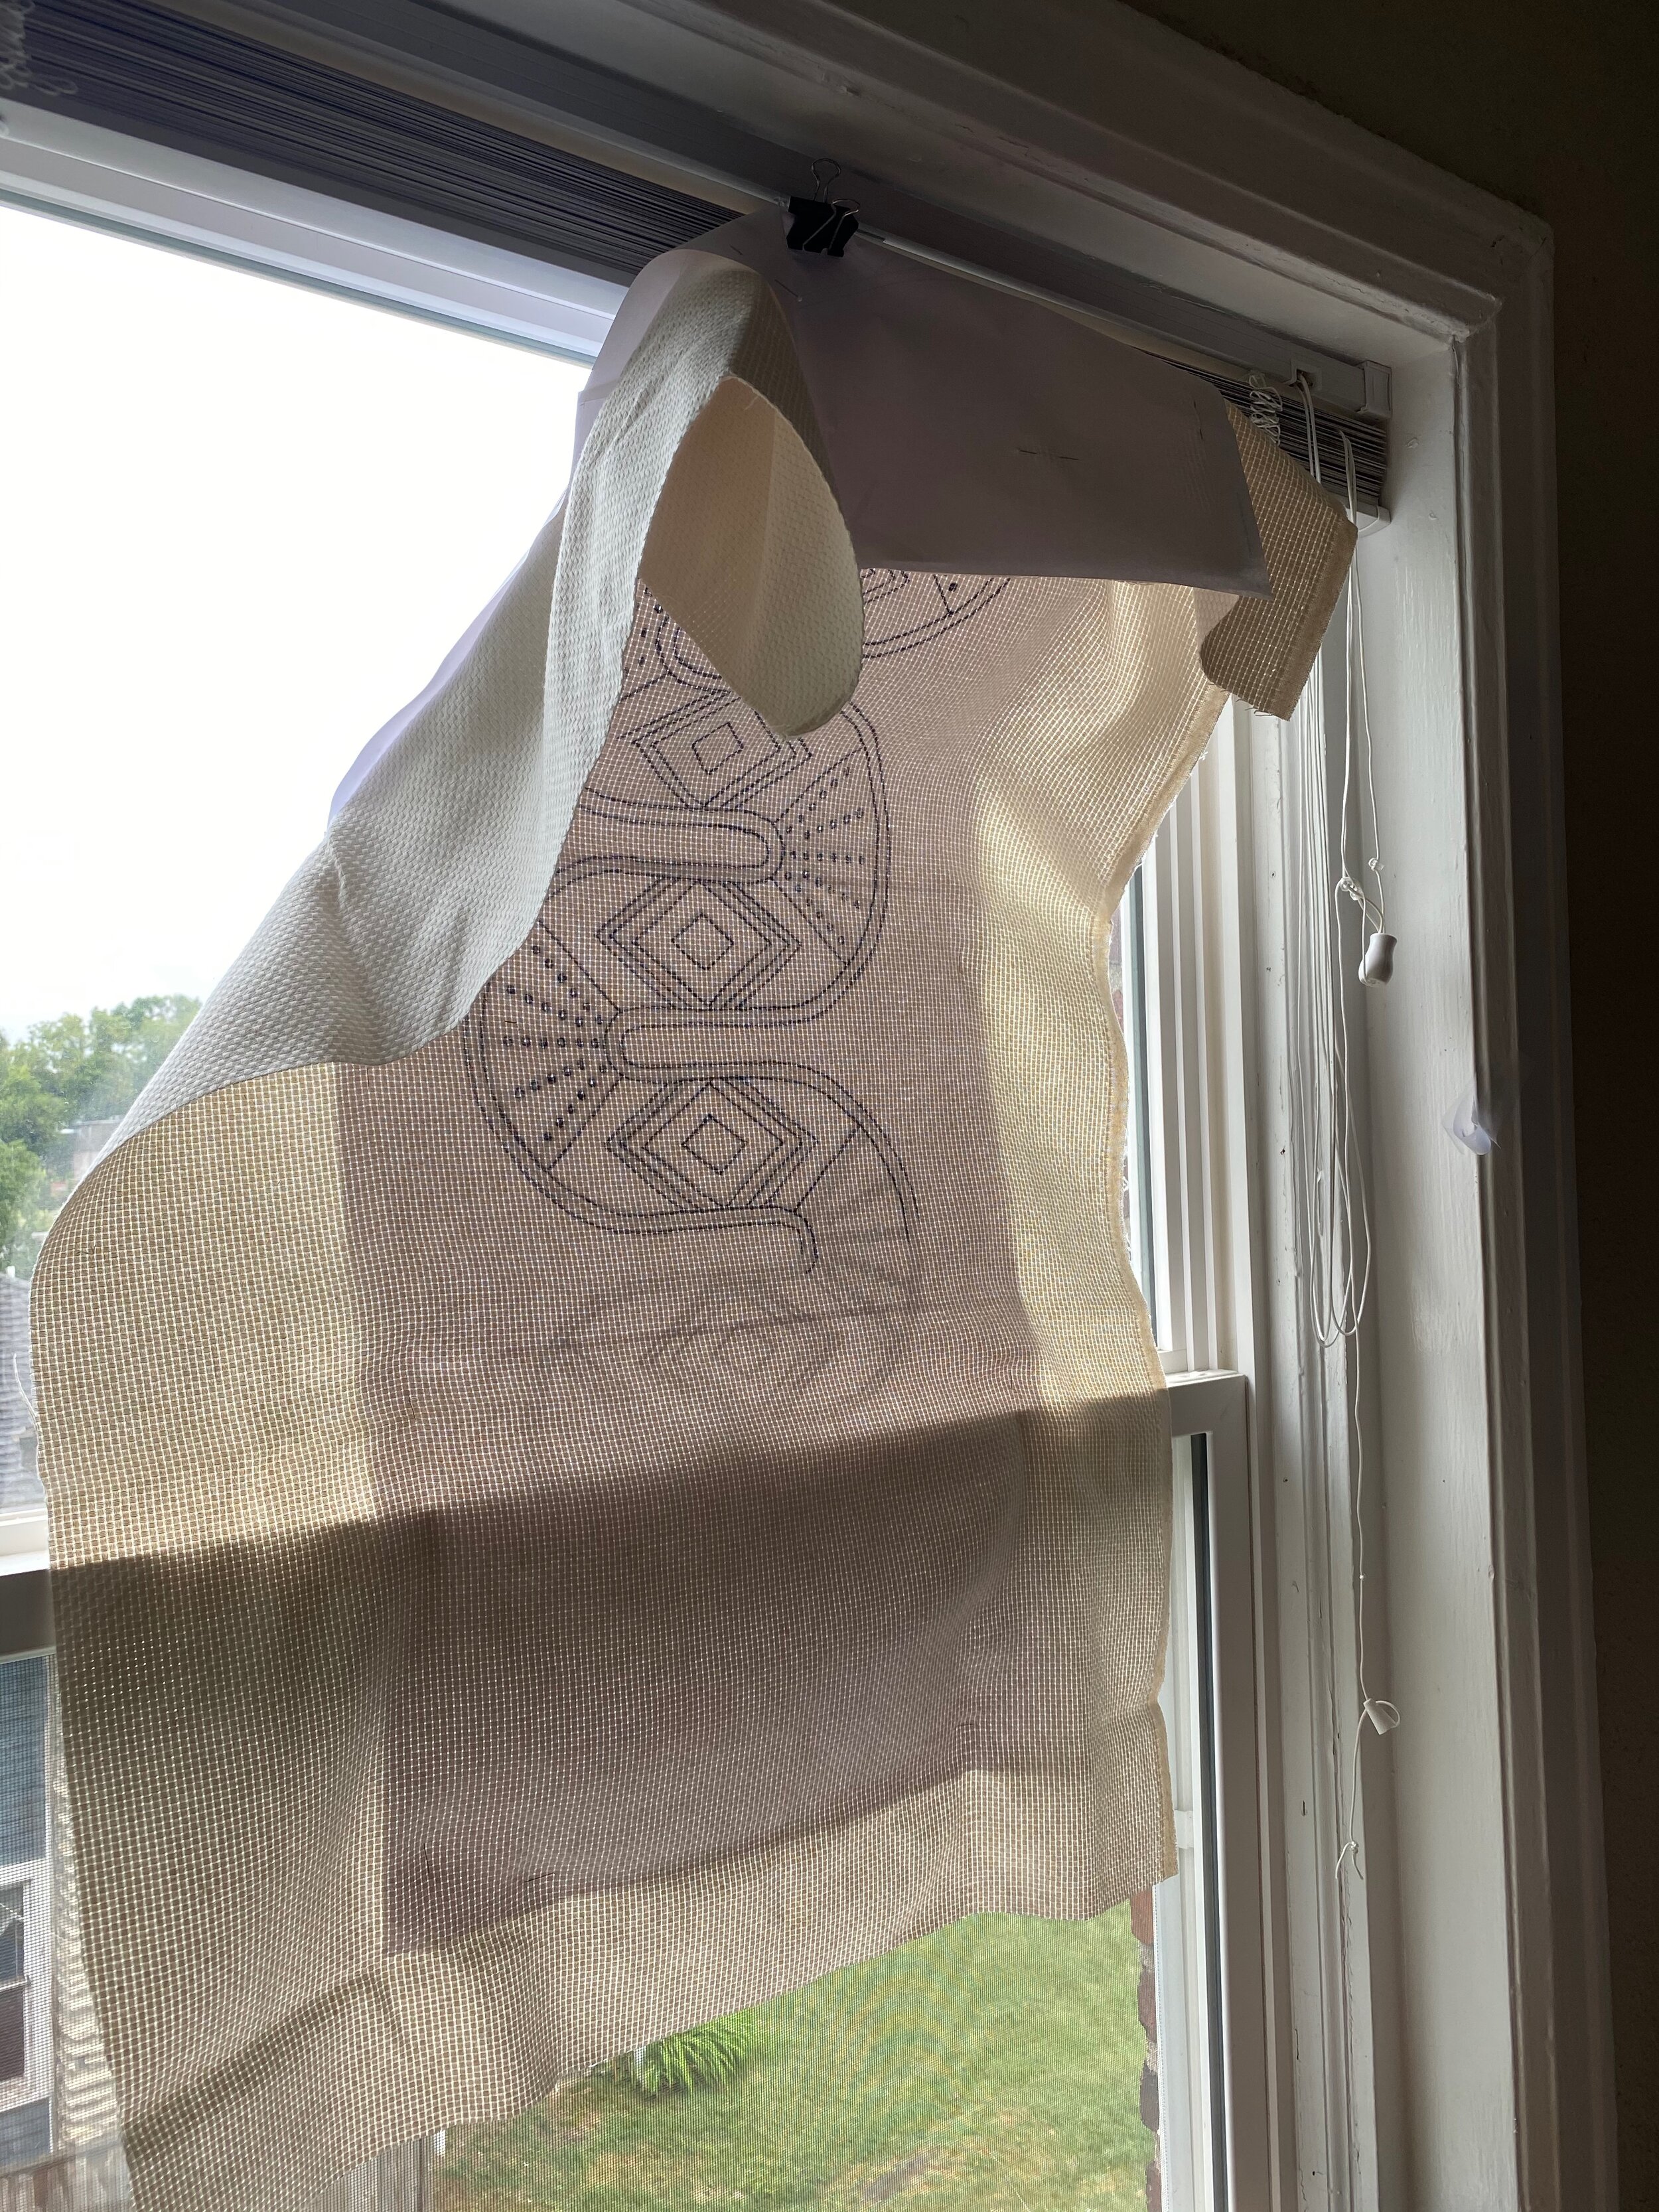
I built my own frame, building it at a size that would allow for a couple inches margin around the entirety of my pattern/template/design. This would allow for wiggle room on the design and room for my hands to work the fabric. I printed my pattern template out to scale, tiled the pieces together, and traced it onto the fabric. You’ll note in my process that I used some of my scrappy art school skills of using the window in place of a light table. After holding my arms above my head for that long, there are few things I would not give to own a light table.
Information Insert: The fabric I’m using for this project is called Monks Cloth. It’s the recommended material for punch needle projects due to its weave, which allows for the tension shift required for punch needle to work.


Next comes stretching the fabric onto the frame. It’s important that the fabric be taut for the process of needle punch to work—a regular theme with this process is that tension is crucial. A key learning from this phase of the project is not to draw the outer frame of the piece, it gets stretched in ways you don’t expect and suddenly your outer rectangle is distinctly not plumb. It wasn’t the cleanest, but for attaching the fabric to the frame, I just went old-school with a staple gun while pulling the fabric into place. It did mean that at the end of the project, I literally cut the fabric off of the frame instead of a clean removal.


At this point, we’re ready to get some yarn involved! Now for the actual process of filling in the pillow front!
A Labor in Yarn
This is (obviously) the longest part of the process, and sort of the hardest part to explain. So the following section will be mostly images with some informational bits and the occasional commentary where I feel it fits.


Information Insert: So with punch needle, you want to actually start with the smallest sections and work outward from there. So you can see in the above sections that I’ve started on the center diamonds and worked outwards, slowly filling in larger and larger blocks.
I started with the diamonds both because it made sense to establish those shapes and because I was avoiding what I knew would be a difficult section (the dots). You’ll also note that this project put me in a difficult position physically. The project is large (literally the frame was huge) and I also needed to be able to reach both the front and the back of the fabric, meaning I spent my hours on this projects in a semi-criss-cross-applesauce seated position, while hunched over and balancing the frame on my knees. Back pain was unavoidable.

When working through the finalized design earlier, I mentioned that I had made the decision to include these “dots” as a way to incorporate texture. One of the reasons I found punch needle to be such an appealing art was this ability to work the yarn in different ways to create different forms. So, as you can see above, the dots have a more 'tufted’ look than the flat method I’ve used for the rest of the snake.
Information Insert: Depending on whether you work the “front” or “back” of the fabric, you’ll either get these loops or the flat coverage. Some patterns also refer to it as the “right” side of the fabric, meaning whichever side you want to be the final, front-facing side.


There’s no wrong place or way to craft, but I would definitely recommend either in a group, gossiping, with wine OR in bed while watching a show on your computer.


Above you can get a good grasp on the idea that is frequently seen in crafting (especially embroidery), which is business in the front, absolute hot yarn mess in the back. And finally, after many, many hours of work, the entire piece is filled in with yarn! Unfortunately, with about 8-square-inches remaining, I ran out of the natural white yarn and had to order more. Can never quite nail down the precise correct amount of yarn required for a project.
Forming the Pillow
After completing the front of the pillow, it was time to remove it from the frame (an absolute butcher job with scissors, there are no photos of this phase). I chose a simple, natural colored linen for the backing of the pillow—something textural and solid but wouldn’t distract from the main event, which was the punch needled part of the project. I had originally thought I would hand-stitch the front to the back fabric, but after many, many hours of work, the appeal of just running it through the sewing machine was too much to resist. Luckily, I was successful with the use of one of the more minimal foot attachments. Bonus photo of me with my completed work the moment it was done.


A comfy-cozy final product
And now for the final reveal! I loved every second/hour/week/month of working on this project and I’m so pleased with the final results. It looks incredible in my bedroom and really makes the space feel complete. I’m looking forward to future projects in this medium, possibly with incorporating some typography. Keep an eye out for future projects (though maybe ones that aren’t quite as large).


